Ceiling fans are a great way to create a comfortable breeze in your home. They also help reduce your energy costs by circulating cooler air.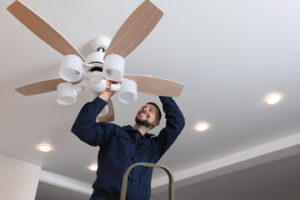
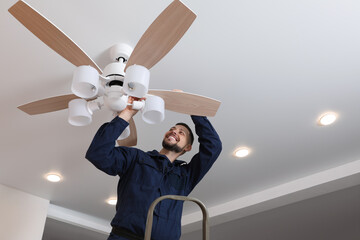
Installing a ceiling fan is an easy and inexpensive home improvement project for any do-it-yourselfer. It takes about a few hours to complete, depending on the type of fan you choose and your level of experience. However, if you need some professional expertise, you can visit https://www.drelectricllc.com/ for more information.
Ceiling fans circulate or cool the air in a room by blowing it one way and drawing dust and other particles into the fan from the opposite direction. All types of fans need to be cleaned on a regular basis to keep them running smoothly. This is especially true if the fan is located in a very dusty area or if it’s used regularly by more people than it should be.
To clean the fan blades, you can spray or soak a cloth in a mild cleaner and gently wipe them down. The fan blades and motor can get very dusty, so it’s best to clean them every week or so to prevent it from building up.
Before you begin cleaning the fan, make sure it is off and the light bulbs are removed so that you don’t accidentally turn it on or cause any electrical damage. Set up a step stool or ladder and place it under the fan to reach the blades safely.
Once you have the fan turned off, use a microfiber cloth to wipe each blade down. You can also spray the blades with a commercial anti-static, dust-repelling product like Endust to help keep them cleaner longer.
If the fan has glass globes around the light bulbs, remove these and wash them in warm, soapy water before replacing them. This will help to prevent the light globes from rattling and shaking when the fan is in use.
You can also change the bulbs to higher-efficiency lightbulbs to save on energy costs and extend the life of the bulb. Before you replace the bulbs, be sure to tighten each mounting screw so that it is evenly tightened.
After the fan is completely clean, switch the blades to their proper direction (clockwise in the winter and counterclockwise in the summer). This is easy to do by switching the rotor on and off.
Depending on your ceiling, you may need to use a ladder or other special equipment to reach the blades. If you are unsure about the safest way to do this, hire a professional to do it for you so that you don’t hurt yourself or harm the fan.
Before installing a ceiling fan, it’s important to prepare the ceiling properly. This will ensure a long-lasting finish and reduce the risk of future damage.
First, remove all loose debris and make sure the area is free of dust and dirt. This will allow you to work efficiently and safely.
Next, clear away the existing electrical box and remove any wiring from the ceiling to prevent injury or damage to the drywall during installation. This will also make it easier to see the hole for the fan box.
If your ceiling is made of plasterboard, sand it down with sandpaper to roughen it up and prep it for paint. This is an important step because sanding helps the paint adhere to the ceiling better and gives a smoother, more durable finish.
Once the surface is sanded, apply a good-quality primer to the ceiling. The type of primer you use depends on the kind of ceiling you’re painting, so check the manufacturer’s instructions to find out which one is best for your project.
When you’re ready to paint, dip a sash brush into the primer and begin cutting in a line where the ceiling meets the wall. Start at the ceiling line and work your way down, using a light touch to avoid brush strokes that may cause lap marks or splatter.
After the primer has dried, you can start laying down the paint. This is an essential part of a successful ceiling painting job because it allows you to cover more material in less time.