post

Carved Concrete Sculptures

Troy Lemon and his team used a concrete mix called Pro Wall to build a hand-carved stone wall for  Carved Concrete Contractor is specially formulated to give the appearance of natural stone and concrete.

Moore organized his catalogs by material – listing works made of stone, terracotta, and concrete, as well as those of wood and stringed figures. He was interested in how different materials might affect the shapes of his work.

carved concrete

Carving concrete on vertical surfaces is a growing niche for the concrete industry. For those with the right mix of skills and tools, this work offers a chance to make good money and satisfy a creative urge. Those who specialize in this type of concrete say it takes some trial and error to get the formula right, but they also suggest that a willingness to learn and experiment will pay off both in cash and satisfaction.

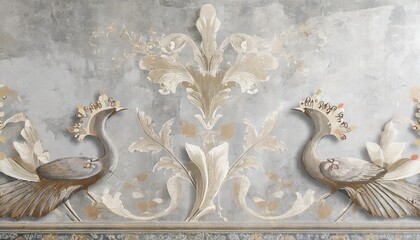
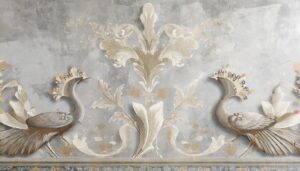
Carved concrete involves using a special concrete mixture that can be shaped, colored and textured to resemble stones, rocks or chiseled wood for a one-of-a-kind decorative accent. Overlays and stamped concrete can also be carved to give a unique appearance to walls, patios and walkways. Many specialty concrete and overlay mixes contain finer grades of sand, polymers and other ingredients that make the material easier to stamp, color and carve. These concrete materials are designed and manufactured to hold their custom-carved shapes and adhere to a wall or other surface without moving, sluffing, sliding or drooping.

The sculptor begins by blocking out the larger containing forms and planes that define the overall shape, then carving progressively until all surface details are reached. This approach allows the sculptor to work more freely and to adapt the original concept as the piece evolves. A sculptor may use either a masonry saw or hand tools, but even the most skilled concrete artists admit that it takes some practice before they feel comfortable with the process. The sculptors recommend starting with something simple such as a stepping stone to build confidence and skills before tackling more difficult projects. It is always recommended that a sculptor wear gloves and a dust mask while working with concrete, as the material can irritate lungs and skin when inhaled.

Some sculptors say that foam core construction is fueling the growth of this market segment, because it makes it much easier to create and reinforce structural integrity for concrete structures. Ness agrees that foam core construction is the wave of the future, but says that it is not a one-size-fits-all solution. He suggests using a new admix called Car-VZ, which was co-developed by his company and \to help solve some of the problems that come with using conventional rebar or lath reinforcement for vertical concrete.

Concrete sculptors use various types of materials to create their art, including specialty concrete mixes and tools, texturing and coloring products and of course the concrete itself. Those who specialize in vertical carving and stamping say that the key to their success lies in using special concrete that’s specially formulated and designed to hold its shape after being carved without sluffing, sliding, drooping or running. They also need a concrete mix that’s designed to be worked with hand tools and that allows them to create the unique textures of rock, wood and other natural materials that they mimic.

Many of the special concrete mixes used in carved concrete projects include finer grades of sand, polymers, reinforced fibers and other additives that allow them to be shaped and carved with ease. They also have much longer setting times than standard concrete, which allows them to be carved or stamped before they’re too hard to work with. The concrete also needs to be made with a low water content, which helps it retain its strength as it dries.

One of the most important ingredients in any carved concrete project is a concrete carving form, which allows contractors to easily create the shapes and contours of the project. There are a variety of different forms available to meet the needs of any project, from free-standing rock walls and seat walls to detailed decorative panels. These forms come in a variety of sizes and shapes to fit any space. Some of these forms are even designed to be used in pools, as they can withstand the high water pressure that’s found in most pool water systems.

Another essential product for carved concrete is a special carveable concrete overlay that’s specially formulated to work with hand tools and to be applied to walls. One such product is Buddy Rhodes’ Tru-Pac X, which can be applied up to 4 inches thick on a properly prepared surface. This lightweight concrete can be carved, sculpted and stamped, and it is compatible with all Buddy Rhodes color pigments and glazes.

The popularity of carved concrete is growing, and experts say that it’s an area where more and more concrete contractors are willing to take a risk on new, creative applications. Emil Gera, for example, says that while his company’s earliest projects were outdoor stone-look features, more of his current clients want to have them in their homes. This past winter, for instance, his crew built a fireplace/entertainment center that looks like it’s made of huge timbers and has sliding barn doors that open and close.

Decorative concrete is no longer limited to flat surfaces. With new material technology and specialty tools, contractors are able to create vertical rock, stone or wood formations that are unique and extremely realistic. Known as stone facing, wall cladding or vertical concrete, this new market niche requires specialized concrete mixes, carving tools and artistic ability.

Those who specialize in the craft can take advantage of a growing demand for unique outdoor features. Emil Gera of says many of his clients are interested in outdoor elements that simulate rock. But he also notes that indoor applications are growing in popularity as well. He recently completed a fireplace/entertainment center for a living room that looks like a massive timber frame.

Joshua Russell of works mostly with commercial clients. His carved concrete projects have included water features for zoos and theme parks, but he also says homeowners are increasingly interested in adding custom sculptural elements to their properties.

The first step in a carved concrete project is to secure a cast, which can be a homemade mold made from plastic or styrofoam or purchased at a hardware store. Then, pour the cured concrete into the cast and allow it to set for several days. Once the concrete has set, it’s time to start sculpting.

Carving concrete is a labor-intensive process. Those who perform the work must be strong and limber. They must also be able to withstand the heat of concrete curing and the physical demands of working on ladders or scaffolding. It’s important to pour the concrete in small, workable sections to prevent it from drying out too quickly and making it difficult to sculpt.

Specialty tools are required for carved concrete, and Giffin recommends looking for a carving tool that comes in multiple sizes and variations. He points out that similar sized, straight-edged tools can result in a look that’s too artificial. Giffin also stresses the importance of using a wide range of textures to make the finished product look authentic. The use of varying textures adds depth and complexity that makes the final product hard to distinguish from real rock, stone or wood.

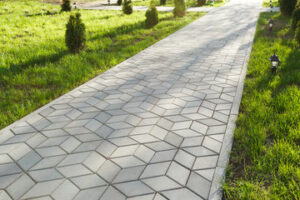
The cost of carved concrete depends on the design you want and the materials used. For example, a plain concrete slab costs $8 to $15 per square foot to pour and finish, while a large patio with curved edges would cost more. Other factors that affect cost include the condition of the existing surface and any prep work that needs to be done, such as removing old materials or leveling the ground. It’s also important to consider other aspects of the project, like if you’ll need a concrete base, which typically costs $65 per cubic yard.

Carving concrete is an expensive, time-consuming process that requires a lot of skill and training. It’s best left to professionals who have the equipment and experience to get the job done right. A professional concrete contractor can provide you with an estimate for the project based on its size, complexity, and location.

Decorative concrete contractors can use a wide range of materials to create the carved concrete you desire. Typically, they start with modern concrete, which is the standard type used for most residential projects, such as driveways and patios. But they can also use stamped concrete, which is a type of concrete that’s “stamped” to create patterns resembling stone or brick. Stamped concrete is more expensive than traditional concrete because it’s a more labor-intensive process.

A specialized form of concrete known as glass concrete uses recycled glass as aggregate. This visually interesting concrete is popular in pool decks and landscaping projects. Other specialized forms of concrete include asphalt concrete, which is fast-curing and used mainly for roads, and self-consolidating concrete, which doesn’t require a cement mixer and is useful in restricted and hard-to-reach areas.

Concrete finishes add color, texture, and durability to a concrete slab. These finishes can enhance the beauty of a slab and complement your home’s architecture. The cost of concrete finishes varies by brand, tint, UV-protection level, and matte or shiny finishes.

The cost of vertical carving concrete varies depending on the design, materials, and construction technique. For example, a basic stamped design with one color and a simple pattern will be cheaper than a more complex design that mimics stone, wood, or brick. Other factors that impact cost are the number of colors and patterns you add, finishing and sealant costs, and installation supplies.

post

The Benefits of a Concrete Driveway

Concrete Driveway Colorado Springs is a great way to improve the value of your home. However, working with a reputable contractor ensures the project is completed properly.

To determine how much concrete to order, create a scale drawing of the driveway. Then, divide it into a series of rectangles and calculate the area for each.

concrete driveway

Concrete is a highly durable material, but it can be expensive. The cost of a concrete driveway depends on several factors, including its size and design complexity. The larger the driveway, the more labor and materials it will require. The location of the driveway can also impact its cost. For example, a driveway built in a cold climate will need to be thicker than a driveway in a warmer one. The thickness of a concrete driveway can also affect its durability and longevity.

A basic concrete driveway costs about $8 to $12 per square foot, including labor and material costs. The cost of a stamped or stenciled concrete driveway will increase the price by $10 to $15 per square foot. If you want to add color to your concrete driveway, the cost will rise even more.

If you’re considering a concrete driveway, be sure to choose a contractor that is licensed and insured. A licensed contractor will have experience in working with concrete, and will be able to provide you with quality service. They will also be able to provide you with an accurate estimate for the project. They will also be able to answer any questions you may have about the process.

When building a concrete driveway, the contractors will first prepare the area. They will dig out the old driveway and then lay down gravel or crushed stone to create a base for the new concrete. They will then use a vibratory plate compactor or rammer to level the base and fill soft spots. They will then add rebar to strengthen the concrete.

Then, the concrete will be poured. The concrete will be allowed to cure. Once it’s cured, the forms will be removed. Labor makes up about 40 percent of the total cost of a concrete driveway. The labor cost includes the excavation, laying and smoothing the concrete, and removing the forms.

Many homeowners opt for a concrete driveway because of its durability and low maintenance costs. However, it’s important to consider the environmental impacts of each option before choosing a type of driveway. For example, asphalt is made from petroleum, a limited resource that requires intensive mining and processing to extract. Moreover, it is not good for the environment because it produces a lot of air pollution. A concrete driveway, on the other hand, is a more environmentally friendly choice.

Concrete is a long-lasting material, and a well-constructed concrete driveway can last for decades. However, like other materials, it requires proper maintenance to extend its lifespan. The type of concrete you use for your driveway, as well as the climate where you live, will play a role in how long it lasts.

To ensure your concrete is as durable as possible, start with the right prep work. The ground should be level, free of organic material, and properly graded. Also, make sure the base layer is compacted. If you’re using a concrete mix that contains de-icing salt, it’s important to spread the salt evenly to avoid corroding the steel reinforcement bars.

Another factor that influences the durability of a concrete driveway is how much weight it supports. If you’re parking multiple cars, trucks, or other heavy vehicles on your driveway, it’s important to choose a concrete that’s designed for the load. For instance, a reinforced concrete mixture is stronger than regular concrete and has a higher load-bearing capacity.

Concrete is an extremely strong material, but it can crack over time if the surface is exposed to excessive stress. The best way to prevent this from happening is to install a proper drainage system. Ensure your gutter downspouts are directing water away from the driveway and that any sloped areas are sloping correctly.

A properly installed concrete driveway should also be protected with a high-quality penetrating sealer. This will help protect the concrete from stains, sun damage, salt, and moisture.

In addition to protecting your concrete, a sealer will help keep the driveway looking new for as long as possible. It’s recommended that you apply a new coat of sealer every 3-5 years.

Unlike asphalt, concrete is not susceptible to heat or sunlight. This makes it a great choice for hotter climates, where other materials may deteriorate due to high summer temperatures and UV rays. This is also an advantage for those who want a driveway that’s easy to clean and maintain.

Concrete is a very durable material, and it can last a long time with proper care. It is also relatively inexpensive compared to asphalt or pavers. However, like any other surface, it requires periodic cleaning and inspection to maintain its beauty and strength. Regular cleaning with a broom or power washer can remove dirt, leaves, and other debris that can stain the surface. In addition, removing oil, gasoline, and chemical spills promptly will prevent the concrete from absorbing them, which can cause discoloration and deterioration over time.

Using caulking to seal cracks and gaps is another simple maintenance task that should be performed regularly. It is important to use a quality caulking that is designed for outdoor use, and to follow the product instructions for application. A driveway with cracks and chips is unsightly, and they can also allow water to penetrate the concrete and cause damage.

In the winter, it is important to remove snow and de-ice your concrete driveway. While salt is effective in reducing ice, it can damage concrete surfaces. New concrete is particularly susceptible to damage from the chemicals in rock salt. Other de-icing products, such as sand, coffee grounds, or alfalfa meal, are safe to use and less damaging to the concrete.

It is also important to sweep the concrete regularly and to remove organic debris from the surface. Sweeping will reduce the accumulation of water that can cause stains or encourage algae to grow. It is a good idea to park vehicles and equipment away from the edges of the concrete, as these are the weakest areas. It is also a good idea to have a professional re-seal the concrete every five years. This will protect the concrete from abrasion and help to prolong its lifespan.

Concrete is a popular choice for driveways because it is durable and comes in a range of design options. The appearance of a concrete driveway is important to many homeowners, as well as the overall look and curb appeal of a home. The appearance of a concrete driveway is enhanced by a variety of design and finishing techniques, including the use of colored concrete and different texture finishes. These options can also help a concrete driveway stand out from the competition and improve the value of a home.

In addition to being a sustainable and cost-effective alternative to asphalt, a concrete driveway is also environmentally friendly. The majority of raw materials used to make a concrete driveway come from natural rock and sand, recycled aggregates, and cement. Depending on the supplier, it is possible for concrete producers to recycle industrial byproducts such as fly ash and ground blast furnace slag. This reduces raw material consumption and keeps waste products out of landfills.

A concrete driveway has the option of being finished with a broom, sprayed, or stamped surface to create a unique look for your home. The broom finish adds a subtle texture that helps with traction. A spray application of concrete color or concrete stain can provide a beautiful finish and hide dirt or stains. Stenciling allows homeowners to imprint a monogram, circle or other design into their concrete driveway.

When compared to an asphalt driveway, a concrete driveway requires less maintenance to keep it looking its best. Because of its light color, a concrete driveway does not require the regular sealing and resurfacing that an asphalt driveway needs to stay in good condition. An occasional power washing with a lower psi can remove dirt and grime from the surface of a concrete driveway.

The natural beauty of concrete makes it a beautiful complement to any home. With its clean lines and modern minimalist aesthetic, a concrete driveway can be the perfect backdrop for landscaping rocks and plantings that enhance the beauty of your property.

A concrete driveway has the option of being coloured to match other decorative outdoor elements like a patio or walkways around your home. A professional concrete contractor can tint the concrete during installation, or add a colour afterward to achieve the desired look.

post

The Basics of Retaining Walls Installation

retaining walls
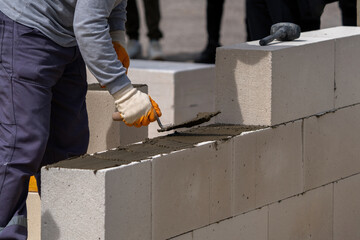
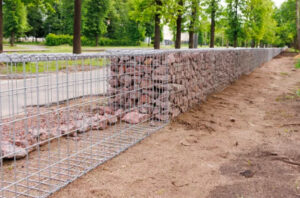
Retaining walls look like simple stacked stone, timber, or concrete block structures, but they are carefully engineered systems that wage an ongoing battle with gravity. They make slopes more usable, help control erosion, and create terraces for landscaping and infrastructure. Before starting, contact your local utility service to have all underground lines marked. Once that is done, begin by laying the first course.

Digging the trench is one of the most important parts of Retaining Walls Charleston SC installation. This is because it is the first step in laying the foundation of the structure, which will determine how strong and stable your finished wall is.

Before digging, it’s a good idea to map out the area of your new retaining wall with stakes and string or even spray paint. This will help you visualize where the blocks are going to go, especially if your retaining wall has any curves in it. It’s also a good idea to call your local utility company before beginning any digging, as they will be able to mark where any underground cables or pipes are located.

If your retaining wall is going to be more than 4 feet tall, you will need to install a drain pipe. This is particularly important if your soil type is clay-based or wet. This is because these types of soils can hold a lot of water, which can cause problems in the long run.

To prepare the base, dig a trench that is approximately four inches deep and wide enough to accommodate the block style you are using (see Base Thickness Chart below). Replace the dirt with a layer of clean granular material, such as crushed rock or gravel, and compact it down by tamping or walking on the surface. Repeat this process for each row until you reach the desired height of your retaining wall.

It’s a good idea to use a vibrating plate compactor for this step, as it will help you get the job done faster and more efficiently. It’s also a good idea at this point to add the perforated drainage pipe, which will be buried behind the backfill and allow water to drain through it as needed.

Choosing the Blocks

After digging your trench and putting in a base, it’s time to start laying the blocks. You want to use quality blocks for retaining walls as they are made to withstand the pressure that will be exerted on them.

You should also use blocks that are made to fit together, preferably with a female groove on one side and a male groove on the other. This helps ensure a tight fit that will hold your wall together as it goes up. It’s also important to make sure the blocks have the correct height. If you’re building a taller wall, it’s a good idea to offset each block slightly back from the one below it, like very shallow stair steps. This will help prevent the soil from pooling behind your wall and potentially causing damage.

It’s also a good idea to plan for drainage when you’re choosing your blocks. Wet soil weighs more than dry soil and a retaining wall that doesn’t have a drainage system can erode quickly. This can damage the structure of your retaining wall as well as other areas in your yard. This can be avoided by including drainage in your retaining wall design or adding drainage channels after the fact.

While many retaining walls are built using concrete blocks, stone is another option that can add character and charm to your home’s exterior. This material is available in a variety of colors and iconic shapes that can fit in with your landscape design. You can even purchase stacked blocks in a wide range of styles to create an architectural look for your retaining wall.

Leveling the Base

Retaining walls are often used to make slopes more usable, or to prevent erosion, but their most important function is that of absorbing and redirecting water and soil pressure. This creates an enormous amount of pressure that can easily cause a wall to fail if not properly addressed. To mitigate this pressure, the backfill material must be porous and able to drain away quickly. Ordinary dirt is generally too dense and can actually increase the force that is exerted on the wall during heavy rains. Using gravel or sand for the backfill is recommended, as it provides an easy outlet for drainage and can significantly reduce this pressure.

To prepare the base, dig to the lines and grades you have established for the retaining walls. Spread a layer of sand or gravel that is approximately 4 inches thick and compact. Some professionals also add a layer of landscape fabric to prevent sand seepage into the backfill.

When laying the first course of blocks, it is crucial that they are level both front to back and side to side. Using a long piece of 2×4 laid across the top of the block is an excellent way to check for levelness. A rubber mallet is helpful to tap each block into place.

Once the level, first course is set, pour and compact your drainage backfill. Be sure to fill the entire area behind and in front of each block course, as well as any areas left at the bottom of the retaining wall. Typically, a maximum of 12″ of drainage aggregate should be placed behind each retaining wall course. This is especially important if your retaining wall design features a steeper slope or if it will be used as a seatwall.

Stacking the Blocks

Retaining walls can be built from a variety of materials, including stones and interlocking concrete blocks. The type of material you choose depends on your preference, budget and skill level. Poured concrete tends to be the cheapest option per square foot, but can require professional installation. Interlocking blocks are less expensive, and offer a more consistent look. Once you’ve chosen your material, you’ll need to dig a trench and apply a base layer. This step is a crucial part of retaining wall installation. It helps ensure that the wall will be sturdy and stable.

First, use a long carpenter’s level to check that the gravel base layer is even. If it isn’t, the walls will be uneven and unattractive. Next, spread a 2-inch layer of sand or gravel over the base. Using the carpenter’s level again, make sure it’s level from side to side and front-to-back. This will set the stage for the rest of your retaining wall.

Place your first course of blocks on the sand or gravel. Press them firmly into the base, and use the carpenter’s level again to make sure they’re even from side to side and front to back. The first block does the most work, and it will set the standard for the rest of your wall. If it isn’t level, subsequent rows will be off as well.

Install the remaining courses of blocks in a “running bond” brickwork pattern, and check for level as you go. Some blocks have angled sides that allow for gently curved walls. To ensure consistency and structural integrity, start every other row with a half block (or the amount required by the manufacturer). This will stagger the seams and provide a stronger and more stable wall.

Finishing the Wall

Retaining walls may look simple stacked stone, block, or timber structures, but they wage an ongoing battle with gravity and restrain tons of soil that would otherwise slump, slide and damage foundations or landscape features. They can increase usable outdoor space by terracing sloped properties and enhance curb appeal with an attractive backdrop to garden areas, patios and pools.

When properly built and waterproofed, retaining walls provide long-lasting, safe landscape solutions. While a well-meaning do-it-yourselfer can build some retaining walls, the complexity and longevity of the structures require precision work and strict adherence to manufacturer’s recommendations. It is also a good idea to hire a professional, especially when building retaining walls in unstable or hazardous locations.

Before starting your project, contact the local utility company to mark any underground lines or cables. You will need to dig down at least four feet for most retaining walls and this can easily damage or disrupt any utilities that run through the area. Once the retaining wall area has been marked, use stakes and string to lay out the perimeter of the structure. This will help you determine the height and length of the walls.

Shovel in the backfill material one tier at a time as you build the wall, and be sure to compact thoroughly. When you reach the desired height of the wall, use a level to make sure it is straight and even. Then, place a piece of landscape fabric over the backfill and compact again.

Once the landscape fabric and retaining wall blocks are in place, you can install the top course of stones. It is important to use a quality paving stone that will last as long as the retaining wall. If you choose a brick, slate or natural stone, be sure to use an adhesive and grout that will hold up under the weather conditions where you live.

post

The Importance of Quality Concrete Masonry

Concrete Contractors Colorado Springs is a critical component of many structures. Whether the masonry is used in an office building or a hospital, knowledgeable and trained inspectors must ensure that construction techniques are consistent with project specifications.

concrete masonry

These individuals might be masons, general contractors, or engineers, depending on their role. Municipal or jurisdictional building inspectors might focus on structural-related items, such as reinforcement size and placement or connector spacing.

The W/C ratio is determined by the amount of water added to the cement and aggregate mix. A well-balanced mixture has a maximum W/C ratio of 0.42. The water in the concrete must be sufficient to allow for complete hydration of the cement and to lubricate the aggregates. Excess water that does not react with the cement occupies pore space in the concrete microstructure, reducing its strength.

To achieve a good W/C ratio, the concrete must be properly mixed and compacted. The concrete must also be cured to prevent cracking and settling. A concrete contractor should be familiar with the proper mixing and curing procedures for various types of concrete.

Masonry structures can range from single-story buildings to multistory load-bearing projects and are used in every type of building occupancy, including residential, commercial, and manufacturing facilities. The complexity and variety of masonry construction continue to evolve, making it even more important that masons use the proper materials and follow accurate testing and inspection procedures.

Technical committees of ASTM International establish testing and sampling procedures for concrete masonry materials and assemblages. These standards are developed with the expertise of researchers, concrete masonry manufacturers, designers, and contractors. They are based on consensus procedures and reflect the best available knowledge of how to sample, test, and inspect concrete masonry.

In addition to the above, a quality masonry company will offer services such as foundation repair/waterproofing, masonry tuckpointing, stonework, and turning crawl spaces into full basements. These services will protect your house from flooding and other weather-related issues. In addition, it will help your family live a healthier life by keeping the temperature stable in all seasons.

Aggregate plays a major role in concrete freshness and hardening. Changing the gradation of aggregate can significantly alter the quality of the concrete produced. Generally, the aggregate must be of good quality and free of excessive fines or other contaminants that can affect cement hydration and interfere with the bond between coarse and fine particles. It is also important to make sure the aggregate is well-shaped. Aggregates that are too angular can result in structural damage and loss of strength. In addition, they can cause surface defects such as popouts.

The grading of an aggregate is determined by the particle-size distribution (PSD). Particles retained on a 4.75-mm sieve are considered coarse, and those that pass the size are considered fine aggregates. Fine aggregates form a significant proportion of the concrete mix. Selecting an aggregate with a PSD close to the desired value specified by the project engineer is crucial.

A good aggregate is rounded and can be obtained from natural sources such as seashore gravels or crushed stones. Rounded aggregates provide a minimum percentage of voids and give more workability. However, they are unsuitable for high-strength concrete because of their lower interlocking capacity and weaker bond strength with the mortar.

The aggregates used in masonry construction must have the right maximum size limit to ensure proper blending of the materials and adequate workability. Choosing an aggregate that is too large can increase the water and cement requirements of the mix and decrease its strength. On the other hand, an aggregate that is too small can lead to segregation and poor workability.

Various aggregates manufacture concrete, including fly ash, river sand, silica sand, suki, burnt clays, cinders, and other waste materials. However, the quality of the aggregates used in concrete depends on the type of material and the placement method. For example, brick chips and crushed stone are coarse aggregates, while sand and gravel are fine aggregates.

Using the wrong aggregate can lead to the failure of a concrete structure. Contractors should regularly check aggregates’ gradation and moisture content to ensure their quality. Moreover, concrete should be used with an optimal gradation consistent with the specific project requirements and construction method. Besides, they should regularly monitor the moisture contents of coarse and fine aggregates to promote batch-to-batch consistency.

Masonry construction is often subject to moisture and requires special considerations to maintain its integrity. The compressive strength of brick and cement mortar is significantly reduced in wet conditions. Likewise, the shear and bond strengths of concrete masonry are reduced. In addition, masonry structures are generally vulnerable to extreme weather events such as high winds and floods.

In many areas, inspection requirements for masonry are based on the provisions of a specific building code, such as the International Building Code (IBC). While these inspection standards provide excellent guidelines, the required inspection remains a source of debate and confusion.

The type of inspections performed and how frequently they are conducted also significantly impact the quality of the masonry constructed. Educated and knowledgeable inspectors who understand the material properties of masonry and how they react to environmental stresses can assist in meeting and maintaining these requirements.

While the curing process that CMUs undergo after forming limits shrinkage cracking and permeability, it does not completely prevent moisture migration within the unit walls. That can result in hairline cracks, which provide pathways for water penetration.

Different moisture resistance treatments are available for concrete masonry, including integral and surface treatment products. Integral products are polymeric products incorporated into the masonry during manufacture to reduce water absorption and subsequent migration. They are generally applied like standard masonry admixtures such as fly ash or Portland cement.

Surface-applied treatments include clear silanes, siloxanes, and acrylics. These clear products form a waterproof barrier on the masonry surfaces, which can reduce the amount of water that penetrates. They are often easier to apply and dry quickly and offer good chalk resistance. However, they do not bridge cracks and voids, so they should be used to clean, air-dry masonry surfaces.

Paints containing alkali-resistant resins are another method for moisture resistance for masonry surfaces. They can be brushed, roller, or spray applied, providing excellent hiding characteristics and durable, flexible, breathable protection. Butadiene-styrene or polyvinyl acetate emulsion paints are examples of these types of paints.

Concrete masonry is durable, long-lived, and requires little maintenance. It also uses minimum energy and other resources for construction, needs minimal repairs and re-use of materials throughout its service life, and does not produce greenhouse gases during manufacture or use. The energy savings, resilience, and greenhouse gas emissions reductions from using concrete masonry more than offset the initial investment.

Non-combustible concrete and masonry construction can help communities achieve their sustainability goals and provide fire resistance that is unavailable with other construction alternatives. Durable concrete masonry construction is also an effective means of providing fire containment in multi-family buildings, where the compartmentalization of units can prevent fire spread from one unit to another.

The strength of concrete masonry helps to resist externally applied forces such as high winds, hurricanes, and tornadoes. The lateral stiffness of concrete masonry, combined with reinforcement, can withstand significant forces without cracking or distortion. Concrete masonry is also highly resistant to seismic forces compared with other types of building construction.

While concrete masonry is a durable material, the external surfaces will eventually show signs of deterioration. That is due to natural weathering processes, including cyclic wetting and drying, leaching, freeze-thaw mechanisms, salt crystallization, and carbonation. Choosing a quality construction method and a reputable masonry contractor who will properly maintain the concrete once it has been installed is important.

Masonry can be made with recycled aggregates, which can increase the project’s environmental benefits. The recycled material must be free of oil, metals, and other contaminants and have a good particle size distribution. Incorporating a crystalline water admixture into the concrete mixture is also beneficial. This admixture has been shown to improve the durability of recycled aggregate concrete. That has been proven for freeze-thaw resistance, but further research is required to confirm the positive impact of crystalline admixture on carbonation depth.

The degree of inspection required for a particular project depends on the scope of work and the design of the masonry structure. Engineers, architects, and general contractors may focus on a masonry project’s aesthetic, weatherproofing, and serviceability aspects. At the same time, municipal building inspectors may concentrate more on structural-related items such as proper connections, reinforcing steel size and location, and connector spacing. An individual designated as a masonry inspector is typically familiar with masonry construction and can read plans and specifications effectively to determine whether construction is in conformance with the project requirements.


 concrete, concrete masonry, concrete installation, concrete maintenance, concrete repair, concrete driveway