The Basics of a Bathroom Remodel

Whether homeowners want to repaint their bathroom vanity or install new fixtures and materials, this project typically increases the home’s value. The home improvement industry describes These essential adjustments as a bathroom remodel or renovation.

Larger-scale remodels involve structural changes to the bathroom footprint, such as moving tubs/showers and toilets, relocating sinks, and resizing drain and water lines. This is often a labor-intensive process that can significantly add to the overall cost. Contact Bathroom Remodel Lexington KY now!

How Long Does a Bathroom Remodel Take? | Rolox Home Service LLC

The cost of a bathroom remodel can vary dramatically. This is largely due to the room size, labor required, and chosen materials. Some homeowners decide to go out and make a dramatic style statement, while others want a more traditional look to boost resale value. It’s important to consider the project’s cost in advance to ensure your budget is maintained.

Before you begin your project:

  1. Create a detailed plan and estimate the costs.
  2. Draw up a timeline and set realistic expectations. This will help you make the right decisions about what to include and what to cut back on.
  3. Creating a savings account specifically for your remodel is also a good idea.

This can help you pay for any unexpected expenses during the renovation.

One of the most expensive parts of a bathroom remodel is removing and disposing of old materials. A contractor may need to remove the flooring, tear down existing drywall, and reframe the walls. This is a time-consuming and labor-intensive process, so it’s important to budget accordingly.

Another factor to keep in mind is the cost of plumbing repairs. It’s important to leave a cushion in your budget for these potential issues, as it’s often what makes or breaks a remodeling project. It’s not uncommon for plumbing problems to arise during a bathroom remodel, and they can add up quickly.

Some ways to reduce the cost of your remodel include reusing existing fixtures, refinishing or resurfacing them, and choosing open shelving instead of cabinets. You can also save money by buying off-the-shelf materials and fixtures.

Many homeowners use home equity loans for bathroom remodels, but other options exist. You can use personal loans, home improvement loans, or credit cards to finance your remodel. Personal loans usually have lower interest rates than home equity loans, and you can use them for a shorter term, which makes repayment easier.

You can also find a top real estate agent in your area to get an expert opinion on how much your home is worth and what improvements will increase its value.

The bathroom layout is one of the most important considerations when remodeling this space. It determines where the tub, shower, toilet, and sink will be. It also dictates how much floor space is available for each fixture. Several different bathroom layouts can be used, each with advantages and disadvantages. A good bathroom layout will maximize space and make the room feel larger. It will also be easy to maintain and keep clean.

Some of the most common bathroom layouts feature a vanity, toilet, and tub/shower combo next to each other. This layout is ideal for small bathrooms and can help reduce construction costs since all plumbing is on the same wall. However, this layout may only work if your guests use the bathroom sparingly because it can create a feeling of closed-off space.

Other layouts feature a separate toilet and water closet. This allows the toilet to be easily accessed from the bedroom but still provides privacy for guests. This layout can be more expensive than a traditional layout, but it can add value to your home.

Another option for a smaller bathroom is to install a bathtub and a pedestal sink in the corner of the room. This will free up much floor space, which can be useful for storage. This layout can be more expensive than arranging the toilet and sink in a straight line, but it can be more visually appealing.

It’s important to understand how the layout of a bathroom remodel affects your budget. Changing the bathroom footprint requires significant alterations to plumbing and electrical lines, which can increase your renovation costs. If you’re planning a major layout change, getting estimates from multiple contractors before beginning the project is a good idea.

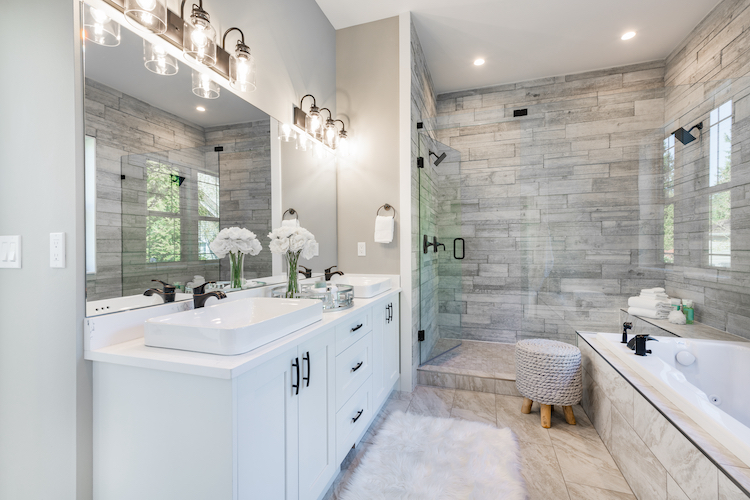
A well-planned bathroom remodel can greatly improve the quality of your life and boost the value of your home. It’s a great way to update outdated fixtures and give your space a new look. It can even be a selling point if you plan to sell your house.

When remodeling a bathroom, you want to ensure that the materials used reflect your style and will hold up well to daily wear and tear. A good remodeler can guide you in selecting the right products. They can also help you stay within your budget without compromising quality or beauty.

Tile and stone are the most popular bathroom building materials. They’re durable, waterproof, and come in various colors and textures. They’re a great option for areas exposed to moisture, like above the shower and behind the sink. Decorative tiles can add character to the room and complement any design style.

For countertops, quartz is a high-quality, stain-resistant option and requires very little maintenance. It’s available in many colors and looks like natural stone, but it’s less expensive than marble or granite. Marble and travertine are another choice for countertops, but they’re typically more expensive than other stones. They can also crack and chip if not properly sealed, so it’s best to use them in niches and other areas that only see a little wear.

Wood elements are another popular choice for bathrooms. They can add a rustic or natural feel to the space and create a warm, inviting atmosphere. They’re also easy to maintain if sealed and protected against water damage. Wood is a great option for cabinets, floors, ceilings, and more. It’s important to note that the type of wood you choose will influence the overall look of your remodel.

Choosing the wrong bathroom materials can be expensive in the long run. Low-cost materials may save you money upfront but will likely require more maintenance than higher-end options. For example, cheap laminate countertops will swell and warp when moisture is exposed, while marble or granite are more durable and resistant to heat.

When choosing materials for your bathroom remodel, ensure they suit your desired style and functional needs. It’s also a good idea to consider the maintenance and energy costs when selecting.

Before embarking on a bathroom remodel project, knowing what you want your new bathroom to look like is important. This step can help you choose materials and design features that fit your budget. If you need help figuring out where to start, many online tools can help you plan.

When choosing your bathroom materials, it’s important to consider their moisture resistance. Most bathrooms are exposed to much water, so selecting materials that can handle this is crucial. Ceramic and porcelain tiles, natural stone, luxury vinyl flooring, and sheet vinyl are favored bathroom materials for their water resistance. In addition, you should choose a grout color that will resist mold and mildew growth.

If you’re going with a tile floor, adding an underlayment that helps prevent the tiles from shifting or cracking is also a good idea. The underlayment also offers a barrier against moisture, making the installation process easier.

Another important consideration is lighting in your bathroom. The light fixtures you choose should provide adequate lighting for your needs. If you’re installing recessed canister lights, look for models that use LED bulbs. These bulbs are energy-efficient and last longer than traditional incandescent bulbs. You should also choose a dimmer switch so you can adjust the amount of light in your bathroom.

Regarding decor, the bathroom is a great place to incorporate your style. For example, you can add decorative elements like plants or art to bring a sense of warmth to your bathroom. Alternatively, adding a soaking tub or a steam shower can create a spa-like feel.

A bathroom remodeling project can be as simple or complex as possible. For example, you can repaint your existing bathroom or install a new vanity and fixtures. However, if you’re changing the layout of your bathroom, you may need to obtain a permit.

Before beginning your renovation, it’s important to understand that bathroom remodeling can be messy and time-consuming. Having realistic expectations and maintaining open communication with your contractor throughout the project is also important.

post

The Basics of Retaining Walls Installation

retaining walls
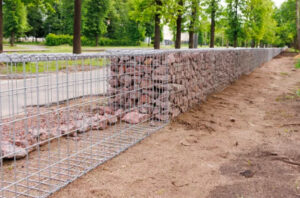
Retaining walls look like simple stacked stone, timber, or concrete block structures, but they are carefully engineered systems that wage an ongoing battle with gravity. They make slopes more usable, help control erosion, and create terraces for landscaping and infrastructure. Before starting, contact your local utility service to have all underground lines marked. Once that is done, begin by laying the first course.

Digging the trench is one of the most important parts of Retaining Walls Charleston SC installation. This is because it is the first step in laying the foundation of the structure, which will determine how strong and stable your finished wall is.

Before digging, it’s a good idea to map out the area of your new retaining wall with stakes and string or even spray paint. This will help you visualize where the blocks are going to go, especially if your retaining wall has any curves in it. It’s also a good idea to call your local utility company before beginning any digging, as they will be able to mark where any underground cables or pipes are located.

If your retaining wall is going to be more than 4 feet tall, you will need to install a drain pipe. This is particularly important if your soil type is clay-based or wet. This is because these types of soils can hold a lot of water, which can cause problems in the long run.

To prepare the base, dig a trench that is approximately four inches deep and wide enough to accommodate the block style you are using (see Base Thickness Chart below). Replace the dirt with a layer of clean granular material, such as crushed rock or gravel, and compact it down by tamping or walking on the surface. Repeat this process for each row until you reach the desired height of your retaining wall.

It’s a good idea to use a vibrating plate compactor for this step, as it will help you get the job done faster and more efficiently. It’s also a good idea at this point to add the perforated drainage pipe, which will be buried behind the backfill and allow water to drain through it as needed.

Choosing the Blocks

After digging your trench and putting in a base, it’s time to start laying the blocks. You want to use quality blocks for retaining walls as they are made to withstand the pressure that will be exerted on them.

You should also use blocks that are made to fit together, preferably with a female groove on one side and a male groove on the other. This helps ensure a tight fit that will hold your wall together as it goes up. It’s also important to make sure the blocks have the correct height. If you’re building a taller wall, it’s a good idea to offset each block slightly back from the one below it, like very shallow stair steps. This will help prevent the soil from pooling behind your wall and potentially causing damage.

It’s also a good idea to plan for drainage when you’re choosing your blocks. Wet soil weighs more than dry soil and a retaining wall that doesn’t have a drainage system can erode quickly. This can damage the structure of your retaining wall as well as other areas in your yard. This can be avoided by including drainage in your retaining wall design or adding drainage channels after the fact.

While many retaining walls are built using concrete blocks, stone is another option that can add character and charm to your home’s exterior. This material is available in a variety of colors and iconic shapes that can fit in with your landscape design. You can even purchase stacked blocks in a wide range of styles to create an architectural look for your retaining wall.

Leveling the Base

Retaining walls are often used to make slopes more usable, or to prevent erosion, but their most important function is that of absorbing and redirecting water and soil pressure. This creates an enormous amount of pressure that can easily cause a wall to fail if not properly addressed. To mitigate this pressure, the backfill material must be porous and able to drain away quickly. Ordinary dirt is generally too dense and can actually increase the force that is exerted on the wall during heavy rains. Using gravel or sand for the backfill is recommended, as it provides an easy outlet for drainage and can significantly reduce this pressure.

To prepare the base, dig to the lines and grades you have established for the retaining walls. Spread a layer of sand or gravel that is approximately 4 inches thick and compact. Some professionals also add a layer of landscape fabric to prevent sand seepage into the backfill.

When laying the first course of blocks, it is crucial that they are level both front to back and side to side. Using a long piece of 2×4 laid across the top of the block is an excellent way to check for levelness. A rubber mallet is helpful to tap each block into place.

Once the level, first course is set, pour and compact your drainage backfill. Be sure to fill the entire area behind and in front of each block course, as well as any areas left at the bottom of the retaining wall. Typically, a maximum of 12″ of drainage aggregate should be placed behind each retaining wall course. This is especially important if your retaining wall design features a steeper slope or if it will be used as a seatwall.

Stacking the Blocks

Retaining walls can be built from a variety of materials, including stones and interlocking concrete blocks. The type of material you choose depends on your preference, budget and skill level. Poured concrete tends to be the cheapest option per square foot, but can require professional installation. Interlocking blocks are less expensive, and offer a more consistent look. Once you’ve chosen your material, you’ll need to dig a trench and apply a base layer. This step is a crucial part of retaining wall installation. It helps ensure that the wall will be sturdy and stable.

First, use a long carpenter’s level to check that the gravel base layer is even. If it isn’t, the walls will be uneven and unattractive. Next, spread a 2-inch layer of sand or gravel over the base. Using the carpenter’s level again, make sure it’s level from side to side and front-to-back. This will set the stage for the rest of your retaining wall.

Place your first course of blocks on the sand or gravel. Press them firmly into the base, and use the carpenter’s level again to make sure they’re even from side to side and front to back. The first block does the most work, and it will set the standard for the rest of your wall. If it isn’t level, subsequent rows will be off as well.

Install the remaining courses of blocks in a “running bond” brickwork pattern, and check for level as you go. Some blocks have angled sides that allow for gently curved walls. To ensure consistency and structural integrity, start every other row with a half block (or the amount required by the manufacturer). This will stagger the seams and provide a stronger and more stable wall.

Finishing the Wall

Retaining walls may look simple stacked stone, block, or timber structures, but they wage an ongoing battle with gravity and restrain tons of soil that would otherwise slump, slide and damage foundations or landscape features. They can increase usable outdoor space by terracing sloped properties and enhance curb appeal with an attractive backdrop to garden areas, patios and pools.

When properly built and waterproofed, retaining walls provide long-lasting, safe landscape solutions. While a well-meaning do-it-yourselfer can build some retaining walls, the complexity and longevity of the structures require precision work and strict adherence to manufacturer’s recommendations. It is also a good idea to hire a professional, especially when building retaining walls in unstable or hazardous locations.

Before starting your project, contact the local utility company to mark any underground lines or cables. You will need to dig down at least four feet for most retaining walls and this can easily damage or disrupt any utilities that run through the area. Once the retaining wall area has been marked, use stakes and string to lay out the perimeter of the structure. This will help you determine the height and length of the walls.

Shovel in the backfill material one tier at a time as you build the wall, and be sure to compact thoroughly. When you reach the desired height of the wall, use a level to make sure it is straight and even. Then, place a piece of landscape fabric over the backfill and compact again.

Once the landscape fabric and retaining wall blocks are in place, you can install the top course of stones. It is important to use a quality paving stone that will last as long as the retaining wall. If you choose a brick, slate or natural stone, be sure to use an adhesive and grout that will hold up under the weather conditions where you live.

post

Job of an Electrician

 Electricians get electrical power from the grid to homes and businesses. They follow blueprints, test and inspect components and equipment, install wiring and lighting, and perform maintenance and repairs.Electrician

Important skills include color vision to identify wires, communication skills to interact with customers, and physical strength to move heavy components. Electricians also need to be concerned about safety.

Electricians install, repair, and maintain electrical wiring, fixtures, and equipment in all types of buildings. They work with both residential and commercial structures and can be self-employed contractors or employees of an electrical company. They often need to communicate with construction workers and clients to provide quotes, discuss project details, and determine the best course of action for installation.

Many electricians have a high school diploma and receive their training through an apprenticeship program that lasts four to five years. Others attend a vocational-technical school that offers certificate programs in electrical technology or other related fields. While attending a vocational school isn’t required for becoming a licensed electrician, it can offer valuable training that can help students gain a competitive edge when applying for an apprenticeship or other job opportunities.

The first stage in an electrician’s career is to learn how to safely handle electrical equipment and wiring. This includes understanding the proper safety precautions when working with electricity and knowing how to properly use tools to avoid injury or death. Electricians also need to understand how to read blueprints and other documents and be able to follow them when installing or repairing wiring.

During the installation process, electricians often need to collaborate with other construction professionals, such as engineers and architects, to ensure that electrical systems are properly designed and installed. They also must be able to effectively communicate with clients and end-users, offering guidance on electrical usage, safety precautions, and energy-saving practices.

In some cases, electricians may need to troubleshoot or repair existing electrical systems. This can include replacing old or damaged wiring, receptacles, and switches, or updating circuit breakers or transformers. They might also be responsible for maintaining or ensuring compliance with applicable building codes and regulations.

Some electricians may specialize in specific areas of the industry, such as residential, commercial, or industrial. Residential electricians install and repair wiring in homes and other dwellings, while commercial electricians work on larger-scale installations in offices, retail stores, schools, and other commercial spaces. Other specialty electricians include marine electricians, hospital electricians, and theater electricians, who are tasked with hanging, focusing, and operating stage lighting instruments and equipment.

Maintenance

Electricians are responsible for ensuring that the electricity flowing through a home, office, or industrial building remains safe and functional. They do this by conducting routine inspections, testing, and repairs on a regular basis. The process involves using devices such as voltmeters, oscilloscopes, and ohmmeters to examine electrical systems and equipment. They also review blueprints and schematics to understand the placement of wiring. These electrical industry professionals typically have a large arsenal of tools and supplies that they use to complete their work.

Most facilities will have a maintenance plan or schedule that they follow. This may be based on government regulations or on the type of equipment in the facility. For example, hospitals must ensure that their medical equipment is serviced at a certain interval to keep it in working condition and safe for patients.

The process of maintenance is critical because minor issues can escalate into major problems and even a power outage. This can be devastating to businesses that rely on the flow of electricity for their operations. In some cases, a business may be forced to shut down for hours or weeks until the problem can be resolved. This can result in lost revenue for the company.

Preventive maintenance can help reduce the number of unexpected issues and downtimes. This can save money in the long run as well as improve productivity and efficiency. Electrical preventive maintenance is particularly important for businesses that rely on high-tech machinery, like manufacturing companies and hospitals. This type of equipment often requires a lot of power and must be serviced at regular intervals to keep it running properly.

Performing preventive maintenance can also help reduce the likelihood of fires in industrial settings. According to the National Fire Protection Association, lighting equipment is the leading cause of fires in these facilities, followed by heating equipment. Preventive maintenance can keep these problems from occurring by catching them early on.

Troubleshooting

The troubleshooting process is a logical and systematic way to analyze a circuit and determine what is causing its faulty operation. It can be a very useful tool for maintenance personnel, who must often deal with malfunctioning equipment in a timely manner to avoid costly downtime and lost productivity.

One of the most important steps in the troubleshooting process is to gather as much information about the problem as possible. This includes knowing how the equipment is supposed to operate as well as identifying any technical documentation that may be available. It is also important to understand the role of malfunctioning equipment within the overall system. This can help you narrow down the source of the problem to a specific component.

Once you have gathered as much information as possible, it is time to start eliminating the possibilities. Use your initial observations to create a list of all the faults that could be responsible for the malfunction. You should then prioritize this list based on the probability that they are the cause of the issue. If a component is very unlikely to be the problem, it should be eliminated from your list.

After you have ruled out all of the potential causes, it is time to perform some tests on the equipment to determine what the actual problem is. This can be done with test instruments such as a multimeter or a volt/ohm meter. You will also want to make sure that you are following your organization’s safety rules and procedures when working on electrical equipment.

It is important to note that many times the root cause of the problem will be obvious and can be identified with careful observation and a little reasoning. For example, it may be as simple as a GFCI receptacle or circuit breaker being tripped or a fuse blowing. In these cases, the repair is generally quick and inexpensive.

However, some problems are more complex and require a deeper analysis of the circuit. In these cases, it is helpful to have a thorough understanding of the components in the circuit and how they interact with each other. This can be accomplished by studying a schematic diagram of the circuit or utilizing the information provided by the manufacturer.

Licensed

Licensed electricians, also known as master electricians, have undergone extensive on-the-job training. This is accomplished through a trade school or an apprenticeship program that lasts up to four years. Apprentices receive paid employment while learning the trade, and some even get college credits.

These professionals are detail-oriented. They work with blueprints and technical diagrams to install, maintain, or repair electrical systems and equipment at construction sites. They may work as part of a team to execute plans drawn up by an electrical engineer or as independent contractors who contract out their services.

The primary duties of a master electrician include reading and interpreting schematics and installing and connecting wires, circuit breakers, outlets, and other electrical equipment. They are knowledgeable of national electrical codes, local ordinances, and safety rules. They are skilled in using specialized tools, including oscilloscopes, ammeters, and voltmeters, to troubleshoot problems and make adjustments.

There are several different specialties for electricians, and many states require licenses at various levels of experience. These include linepersons, who work on electric utility company distribution systems and deal with higher voltages, and inside wiremen, who are skilled at the lower voltages used in buildings. Other sub-specialties include industrial, commercial, fire alarm, and low-voltage data wiring, which is often called voice-data-video (VDV).

If you’re interested in becoming a licensed electrician, it’s important to talk with professionals in your area. Ask if you can shadow them on a job or assist them on one of their projects to gain hands-on experience in the field. You should also look into trade schools in your area to learn about their programs and requirements.

In addition to gaining on-the-job training, apprentices and journeymen must pass a licensing exam before moving up to master electrician status. This is typically a closed-book, multiple-choice test covering the National Electrical Code and local regulations. In addition, the master must have performed well in the trade for a period of time, usually seven to ten years, and have passed an examination to demonstrate superior knowledge of the National Electrical Code, or NEC.

post

How to Find a Painting Contractor

There are many reasons why you should hire a painting contractor. Whether you are re-painting your home or office or want to change the color of your exterior walls, you may need to hire a professional Painters. Fortunately, there are several steps you can take to ensure that you find the best painting contractor for your project.

LandscapingThe estimate for the painting job is more than you expect. When estimating a painting job, it is important to have a strategy. Your strategy can distinguish between breaking even and making a healthy profit. It is also important to provide accurate estimates for your clients. Creating estimates can take a lot of time. It is easier to estimate your work with a software program. But there are other ways to create an estimate that will give you a good idea of what your painting job will cost.

First, you should get an idea of the square footage of the area to be painted. Some painters use a tape measure, but you should be able to get an idea of the actual length and width of the walls by taking a walk around the house.

A well-prepared painting services description is a must for any contractor. These descriptions help to ensure that the painting process goes as smoothly as possible. It also helps to streamline communication. A good painting service description should list all of the important elements of a painting project. They should include the time and date the project will start and end, the required materials and equipment, the total cost, and a payment schedule.

The best painting services description should not only describe the work to be performed, but also explain why the project is important. While it is not uncommon for painters to have a standard contract, a customized service agreement is likely to be more beneficial.

The first step in calculating the cost of the job compared with the estimate is to understand how to measure square footage. This can be tricky. A good way to measure the square footage of a room is to use the formula, which is length x width. Then, you multiply the numbers to get the square footage.

Using the square footage calculation, you can get a rough idea of how much it will cost to paint a room. Next, you need to know how many gallons of paint you will need. You can calculate the average number of gallons of paint needed for a project by using the following equation.

There is no denying that a well thought out paint job will improve the aesthetics of a home or business. However, there is more to it than just color. A solid contract is one key to getting the job done right the first time. With that in mind, the best way to go about the task is to engage the services of a competent contractor who knows his stuff. If you are looking to hire someone, be sure to ask about perks like insurance, liability and warranty. Some painting companies even offer referral bonuses. The best part is that a competent contractor is usually willing to budge on the price tag. They may even require an upfront deposit to get the ball rolling.

The maintenance of a painting contractor’s space is a daunting task. However, there is more than one way to keep your venerable abode in top shape. Using the services of a reputable painting contractor is the way to go. 

Painting a commercial or residential building is no small feat. A painter’s crew is capable of completing the job in a fraction of the time it would take you to complete the job yourself. Additionally, the best painters in town have a wealth of industry knowledge and expertise. This translates into a superior finished product.

Painting contractors can be successful if they have a basic understanding of the different painting techniques. They should also have the ability to communicate with clients and bid on jobs. In most states, painting contractors must obtain a license. The requirements for obtaining a license vary from state to state, and the criteria are based on the locality. Some state regulations require a specific amount of experience or may require a certain exam.

To become a licensed painter, applicants must be at least 18 years old, have a valid Social Security number, and have a clean criminal background. Most states also require applicants to provide proof of work experience.

post

Beware Of Space Heaters: They Must Be On A Dedicated Line

Residential>Troubleshooting & Repair ServicesGFCI OutletsAFCI BreakersWhole House Surge ProtectionElectrical Safety InspectionsSmoke & CO DetectorsGenerator InstallationElectrical Panel UpgradesDedicated CircuitsIndoor LightingLandscape LightingFan InstallationPool & Hot Tub WiringEV Charger InstallationWhole House RewiringHome Theater InstallationCommercial>Troubleshooting & Repair ServicesDedicated Computer CircuitsElectrical Safety InspectionsSurge ProtectionGenerator InstallationElectrical Panel UpgradesBucket Truck ServicesEquipment HookupsIndoor & Outdoor LightingReviewsService Areas>Montgomery County, PABucks County, PAChester County, PADelaware County, PABerks County, PAPhiladelphia County, PAPhotosTeamBlogDealsCommunityAchievementsComicsCareersCompanies

Beware Of Space Heaters: They Must Be On A Dedicated Line

It’s that time of year again. The cold air has finally entered the Southeastern, PA region, just in time for Christmas. Some of us are hoping for snow on the big day we gather to celebrate the birth of Christ. Others are envisioning a time when they are sprawled out on the beach again in the blazing sun with a romance novel. Either way, it’s winter-time in Pottstown, PA and many of us are dusting off the space heaters left in storage and plugging them in to keep warm. 

KB Electric LLC received a call today from a customer that needed his burnt outlet replaced. Upon arrival, we found out why the customer’s receptacle was burnt: he had a space heater plugged into it. Space heaters MUST be on a dedicated line to ensure proper safety of the unit and the safety of your home. If you use a space heater or are thinking about buying a space heater for a room in your home, please take the time to read this blog as we go into more depth about space heaters on a dedicated line. Please also refer to one of our previous blogs here to learn more about space heater safety.


What Is a Dedicated Line?

A dedicated line is a line that runs from your main electrical panel on its own circuit breaker to its own dedicated outlet/receptacle. This line/circuit is designated for only ONE appliance.


Why Do Space Heaters Needs To Be On A Dedicated Line?

The reason for a dedicated line is to not overload your electrical system because of its heavy electrical load that it produces. Dedicated lines prevent blown circuits and fuses, tripping breakers, electrical fires, overheating wires, and damage of appliances. Many appliances should have their own dedicated line and circuit breaker with dedicated outlet like refrigerators, microwaves, ranges, freezers, dryers, washing machines, space heaters, heaters, hot tubs, water pumps, sump pumps, A/C units, etc. (ANYTHING THAT DRAWS A LOT OF ELECTRICITY WHEN IN USE)

Your space heater is an “appliance” that needs to be on its own circuit breaker and line with its own outlet/receptacle because it draws a lot of electricity. If the space heater shares a circuit with multiple things in use, it can overheat the wires, cause an electrical fire, damage the space heater, and burn your outlets. IT IS A FIRE HAZARD TO HAVE A SPACE HEATER SHARING A CIRCUIT WITH OTHER APPLIANCES/DEVICES. PLEASE BE AWARE OF THIS WHEN YOU ARE PLUGGING IN YOUR SPACE HEATER.


Burnt Outlet From Space Heater
Burnt Outlet From Space Heater Not On A Dedicated Line


I Need a Dedicated Line For My Space Heater. Who Should I Call?

A licensed and insured electrician should be the only professional to install a dedicated line for your space heater. A dedicated line for any appliance consists of a dedicated outlet, circuit breaker in your main electrical panel, and a dedicated wire/line running from your main panel to the dedicated outlet. An electrician has the hands-on experience to install dedicated lines, as well as the NEC knowledge to install them correctly and safely.

Call KB Electric LLC today if you are in need of a dedicated line for your space heater. We are licensed and insured, family-owned and operated for over 15 years, and all of our technicians are background-checked, uniformed, and perform continuing education classes to be versed in the latest NEC requirements. (267) 467-3178 

CATEGORIES

4-Prong OutletsAbout KB Electric LLCAttic FansBallast ReplacementBathroom LightingBollard LightsCable Outlet InstallationCarbon Monoxide DetectorsCeiling Fan InstallationChandelier InstallationChristmas Light SafetyCircuit BreakersCommercial Electrical Safety InspectionsCommercial ElectricianCommercial LightingCurrent Events with ElectricityCurrent Events: EnergyDeck LightingDeck Receptacles/OutletsDedicated CircuitsDeicing CablesDimmer SwitchesDisposing Light BulbsDoorbellsDryer Booster FansElectricity and Energy InnovationsElectric Baseboard Heater InstallationElectric Car Charging InstallationElectric Radiant Floor HeatingElectrical InformationElectrical InnovationsElectrical Panel UpgradeElectrical Remodeling ServicesElectrical Safety InspectionsElectrician vs. Electrical InspectorElectricity BillElectromagnetic FieldsEmergency DisconnectsEmergency Lighting and Exit Sign LightingEnergy Saving TipsEthernet Wall JacksEV Charging SafetyExhaust FansFestoon LightingGarage WiringGeneratorsGFCIsHigh Bay LightingHire a Licensed ElectricianHistory of Ceiling FansHistory of the Dimmer SwitchHistory of Electric CarsHome Electric Car Charging InstallationHot Tub WiringHouse RewireIn The NewsIntercom SystemsKitchen LightingKnob & Tube WiringLED Ballast BypassLED Christmas LightsLED Retrofit LightingLEDsLi-Fi TechnologyLight Color TemperatureLightingLightning FactsLow Voltage Landscape LightingMotion SensorsMoonlightingOutlet SafetyOutdoor Ceiling FansOutdoor Home Security Lighting TipsOutdoor Lamp PostsOutdoor LightingOutdoor Outlet CoversOutdoor Receptacles/OutletsOutdoor Shed WiringParking Lot LightingPendant LightingPhotocell SensorsPool WiringPower and Communication PolesPrivate Utility PolesProperty Management ElectricianRange HoodsRecessed LightsRecessed OutletsRenewable EnergyRomex WiringRV Home Electrical HookupSafety & PreventionShed WiringSingle Phase to Three PhaseSmall BusinessesSmart Light SwitchesSmart OutletsSmart ThermostatsSmoke DetectorsSolar Powered ElectricitySpace HeatersStorefront LightingSurge ProtectionSwimming Pool Electrical SafetySwimming Pool Area LightingSwimming Pool LightingThanksgiving FunTools of the TradeTrack Lighting InstallationTransformersTunable White LEDsTV Wall Mount InstallationTwist Lock ReceptaclesUnder Cabinet LightingUSB OutletsVideo Doorbells

The post Beware Of Space Heaters: They Must Be On A Dedicated Line appeared first on KB Electric LLC.

post

Whole House Surge Protection Type 2: Panel Based Surge Protector

Residential>Troubleshooting & Repair ServicesGFCI OutletsAFCI BreakersWhole House Surge ProtectionElectrical Safety InspectionsSmoke & CO DetectorsGenerator InstallationElectrical Panel UpgradesDedicated CircuitsIndoor LightingLandscape LightingFan InstallationPool & Hot Tub WiringEV Charger InstallationWhole House RewiringHome Theater InstallationCommercial>Troubleshooting & Repair ServicesDedicated Computer CircuitsElectrical Safety InspectionsSurge ProtectionGenerator InstallationElectrical Panel UpgradesBucket Truck ServicesEquipment HookupsIndoor & Outdoor LightingReviewsAreas We Serve>Montgomery County, PABucks County, PAChester County, PADelaware County, PABerks County, PAPhiladelphia County, PAPhotosOur TeamBlogDealsCommunity OutreachCompaniesCareersAccomplishments

Whole House Surge Protection Type 2: Panel Based Surge Protector

Three years ago we blogged about the type 1 SPD (surge protector device) called a meter base surge protector. Today we are going to talk about the whole house surge protection type 2 which is called a panel based surge protector. It is important for your home to have at least one type of whole home surge protection. It is also now required by the 2020 NEC (National Electrical Code) that all residential service upgrades, replacements, and new service installations (new construction of homes) have type 1 or type 2 surge protection installed. With that said, let’s get right into what whole house surge protection type 2 is, why it’s important for your home to have this surge protector installed, and who to call to get one installed.


What Is Whole House Surge Protection Type 2?

Whole house surge protection type 2 refers to a SPD that mounts right next to your main electrical panel. Type 2 devices that are installed on your main electrical panel help with absorbing some of the surge from the outside that may leak in from a type 1 SPD (meter based). To recap from one of one of our previous blogs about electrical surges, a surge is an increase of electrical voltage. Extra voltage can damage the wiring that is connected to our appliances inside of your home, and can even fry the appliance itself.


Why Do I Need A Panel Based Surge Protector?

Panel based surge protectors protect the breakers/circuits in your main electrical panel from lightning surges, utility line surges, etc. These circuits as you know are connected to certain appliances, and these appliances/devices can cycle on and off. 80% of surges occur within the home. A panel based surge protector serves as an extra line of protection next to the meter based surge protectors, protecting everything in your home from damage.


KB Electric LLC For Whole House Surge Protector Installation

It’s very important to have a form of defense for your electronics, appliances, devices, etc. in your home. It costs a lot of money to replace these household items. There is an easy solution for surge protection for your home appliances and devices, and it starts with a professional for a type 1 or type 2 surge protector installation. Whether you are in need of type 1 surge protection or type 2 surge protection installation, the master electricians at KB Electric LLC can hook you up! Call us today for exceptional service, quality workmanship, and friendly faces! (267) 467-3178


CATEGORIES

4-Prong OutletsAbout KB Electric LLCAttic FansBallast ReplacementBathroom LightingCable Outlet InstallationCarbon Monoxide DetectorsCeiling Fan InstallationChandelier InstallationChristmas Light SafetyCircuit BreakersCommercial Electrical Safety InspectionsCommercial ElectricianCommercial LightingCurrent Events with ElectricityCurrent Events: EnergyDeck LightingDeck Receptacles/OutletsDedicated CircuitsDeicing CablesDimmer SwitchesDisposing Light BulbsDoorbellsDryer Booster FansElectricity and Energy InnovationsElectric Baseboard Heater InstallationElectric Car Charging InstallationElectric Radiant Floor HeatingElectrical InformationElectrical InnovationsElectrical Panel UpgradeElectrical Remodeling ServicesElectrical Safety InspectionsElectrician vs. Electrical InspectorElectricity BillElectromagnetic FieldsEmergency DisconnectsEmergency Lighting and Exit Sign LightingEnergy Saving TipsEthernet Wall JacksEV Charging SafetyExhaust FansFestoon LightingGarage WiringGeneratorsGFCIsHigh Bay LightingHire a Licensed ElectricianHistory of Ceiling FansHistory of the Dimmer SwitchHistory of Electric CarsHome Electric Car Charging InstallationHot Tub WiringHouse RewireIn The NewsIntercom SystemsKitchen LightingKnob & Tube WiringLED Ballast BypassLED Christmas LightsLED Retrofit LightingLEDsLi-Fi TechnologyLight Color TemperatureLightingLightning FactsLow Voltage Landscape LightingMotion SensorsMoonlightingOutlet SafetyOutdoor Ceiling FansOutdoor Home Security Lighting TipsOutdoor Lamp PostsOutdoor LightingOutdoor Outlet CoversOutdoor Receptacles/OutletsOutdoor Shed WiringParking Lot LightingPendant LightingPhotocell SensorsPool WiringPower and Communication PolesProperty Management ElectricianRange HoodsRecessed LightsRecessed OutletsRenewable EnergyRomex WiringRV Home Electrical HookupSafety & PreventionShed WiringSingle Phase to Three PhaseSmall BusinessesSmart Light SwitchesSmart OutletsSmart ThermostatsSmoke DetectorsSolar Powered ElectricitySpace HeatersStorefront LightingSurge ProtectionSwimming Pool Electrical SafetySwimming Pool Area LightingSwimming Pool LightingThanksgiving FunTools of the TradeTrack Lighting InstallationTransformersTunable White LEDsTV Wall Mount InstallationTwist Lock ReceptaclesUnder Cabinet LightingUSB OutletsVideo Doorbells

The post Whole House Surge Protection Type 2: Panel Based Surge Protector appeared first on KB Electric LLC.

post

Tools of the Trade: Milwaukee Electric Tool Corp For The KB Electric Men

Residential>Troubleshooting & Repair ServicesGFCI OutletsAFCI BreakersWhole House Surge ProtectionElectrical Safety InspectionsSmoke & CO DetectorsGenerator InstallationElectrical Panel UpgradesDedicated CircuitsIndoor LightingLandscape LightingFan InstallationPool & Hot Tub WiringEV Charger InstallationWhole House RewiringHome Theater InstallationCommercial>Troubleshooting & Repair ServicesDedicated Computer CircuitsElectrical Safety InspectionsSurge ProtectionGenerator InstallationElectrical Panel UpgradesBucket Truck ServicesEquipment HookupsIndoor & Outdoor LightingReviewsAreas We Serve>Montgomery County, PABucks County, PAChester County, PADelaware County, PABerks County, PAPhiladelphia County, PAPhotosOur TeamBlogDealsCommunity OutreachCompaniesCareersAccomplishments

Tools of the Trade: Milwaukee Electric Tool Corp For The KB Electric Men

This week, I’ve decided to ask the technicians at KB Electric LLC what brand of tools they use on the job and why. And hey, if the company we use reaches out to us and gives us some free products for giving them a shout-out, we are all for it!

But the main reason I’m blogging about them is to keep our customers and potential customers informed about the brand we trust most to get our jobs done right the first time. To my surprise, all of our guys use the Milwaukee brand. So I also decided to do a little bit of research about the Milwaukee Electric Tool Corporation to get to know the company behind the brand we use in the field. Let’s get right to it!


bout Milwaukee Electric Tool Corp.

First and foremost, the Milwaukee Electric Tool Corp. is an American-based company since 1924. It all started at the close of World War I when Henry Ford needed a fabricator to create a light-weight power drill. He went to a man by the name of A.H. Petersen who invented the Hole-Shooter. It was the first drill that was light enough to use with one hand, weighing in at only 5 pounds. After a tragic fire destroyed Petersen’s facility, his business partner Albert F. Siebert re-opened it as Milwaukee Electric Tool Corp. after buying the remaining assets at auction. During Milwaukee’s beginning years, they applied Navy standards to all of their portable tools and began manufacturing tools for military and Navy personnel. Milwaukee began producing tools for World War II as well when demand was high.

By 1951, Milwaukee introduced their infamous Sawzall® Reciprocating Saw. This was the first portable hacksaw to have a reciprocating mechanism. Since the unveiling of the Sawzall®, they’ve been revolutionizing the tool industry. In 2008, Milwaukee created Ice Hardened™ technology, a cryogenic hardening process enabling their accessories to last up to 50% longer than the competitors.

Milwaukee has many facilities throughout Wisconsin and Mississippi that manufacture their corded SawZall and blades, LED lights, drills, and a slew of other things 

The tool industry as a whole likes to lean more towards cheaper labor out of America, as with many other industries. That said, most of Milwaukee’s other tools like their cordless power drills and saws are not made here in the US. 

That being said, what I’ve read so far is that Milwaukee is also planning to expand into Cookeville, TN, as well as opening a new facility in West Bend, WI. The West Bend location will be for tools for electricians, plumbing and mechanical trades, and utility linemen. In 2020 alone, they’ve invested over $100 million and created 350 new jobs right here in the US! Hopefully we will see more of this in the years to come.


M12 and M18 Power Tools

Milwaukee is known for their M12 and M18 cordless power tools. In our field of work, the techs at KB use both. Our big drills and saw/cutting tools are the M18s. The M12s work well for our hand drills. 

The main difference between the M12 and M18 tools: power. M12 power tools use 12v, and the M18 use 18v. The M12 power tools are lighter and more portable. M18s are well known for their higher operating power, long run time, and durability. There are over 100 tools in the M12 system, and over 200 tools in the M18 system. 


KB Electric LLC’s Favorite Milwaukee Tool 

All of our technicians say the best Milwaukee tool on the job is the M18 18-Volt Lithium-Ion Cordless Oscillating Multi-Tool pictured below. Our newest man on our team, Mason Kent says it’s because it’s a beast. Our technician Darren says you can cut literally everything with it: cut outs for boxes, making cuts to install recessed lights, etc.

The “Ozzy” as the guys call it, uses an M18 REDLITHIUM battery with a 40% more run time. Milwaukee claims this tool is 50% faster and does twice as many cuts per charge than the competitors. It’s got a built-in LED light, and it’s motor delivers 11,000 OPM to 18,000 OPM. This tool can cut through different types of material from metal to large cuts of hardwoods. It also comes equipped with a 12-setting dial for varying speeds dependent on your specific job.


M18 18-Volt Lithium-Ion Cordless Oscillating Multi-Tool


Why The Men At KB Electric LLC Prefer Milwaukee Over The Other Guys

KB Electric LLC has been in business since 2004. The technicians in the field didn’t always use the Milwaukee brand though. In fact, our technician/installer, Brian Hughes informed me that all of our guys have been using Milwaukee since probably around 2017. Before then, the guys used a variety of brands, mainly Craftsman, Dewalt, and Bosch. When I asked Brian why he preferred Milwaukee, he said:

“Oh man, we started with Craftsman & Dewalt. Batteries died too quick and would literally fall out over time. Bosch impact drill wasn’t too bad. Batteries last longer, drills are more powerful (Milwaukee).  And they replace products no questions asked. They are a Godsend!”


Sources:

Are Milwaukee Tools Made in the USA?

https://www.milwaukeetool.com/Company/Milwaukee-Story

https://www.cableorganizer.com/learning-center/articles/history-of-milwaukee-tools.php

https://www.acmetools.com/blog/milwaukee-m12-and-m18-battery-buying-guide/

CATEGORIES

4-Prong OutletsAbout KB Electric LLCAttic FansBallast ReplacementBathroom LightingCable Outlet InstallationCarbon Monoxide DetectorsCeiling Fan InstallationChandelier InstallationChristmas Light SafetyCircuit BreakersCommercial Electrical Safety InspectionsCommercial ElectricianCommercial LightingCurrent Events with ElectricityCurrent Events: EnergyDeck LightingDeck Receptacles/OutletsDedicated CircuitsDeicing CablesDimmer SwitchesDisposing Light BulbsDoorbellsDryer Booster FansElectricity and Energy InnovationsElectric Baseboard Heater InstallationElectric Car Charging InstallationElectric Radiant Floor HeatingElectrical InformationElectrical InnovationsElectrical Panel UpgradeElectrical Remodeling ServicesElectrical Safety InspectionsElectrician vs. Electrical InspectorElectricity BillElectromagnetic FieldsEmergency DisconnectsEmergency Lighting and Exit Sign LightingEnergy Saving TipsEthernet Wall JacksEV Charging SafetyExhaust FansFestoon LightingGarage WiringGeneratorsGFCIsHigh Bay LightingHire a Licensed ElectricianHistory of Ceiling FansHistory of the Dimmer SwitchHistory of Electric CarsHome Electric Car Charging InstallationHot Tub WiringHouse RewireIn The NewsIntercom SystemsKitchen LightingKnob & Tube WiringLED Ballast BypassLED Christmas LightsLED Retrofit LightingLEDsLi-Fi TechnologyLight Color TemperatureLightingLightning FactsLow Voltage Landscape LightingMotion SensorsMoonlightingOutlet SafetyOutdoor Ceiling FansOutdoor Home Security Lighting TipsOutdoor Lamp PostsOutdoor LightingOutdoor Outlet CoversOutdoor Receptacles/OutletsOutdoor Shed WiringParking Lot LightingPendant LightingPhotocell SensorsPool WiringPower and Communication PolesProperty Management ElectricianRange HoodsRecessed LightsRecessed OutletsRenewable EnergyRomex WiringRV Home Electrical HookupSafety & PreventionShed WiringSingle Phase to Three PhaseSmall BusinessesSmart Light SwitchesSmart OutletsSmart ThermostatsSmoke DetectorsSolar Powered ElectricitySpace HeatersStorefront LightingSurge ProtectionSwimming Pool Electrical SafetySwimming Pool Area LightingSwimming Pool LightingThanksgiving FunTools of the TradeTrack Lighting InstallationTransformersTunable White LEDsTV Wall Mount InstallationTwist Lock ReceptaclesUnder Cabinet LightingUSB OutletsVideo Doorbells

The post Tools of the Trade: Milwaukee Electric Tool Corp For The KB Electric Men appeared first on KB Electric LLC.

post

Dryer Booster Fan: What Is It And How Does It Work?

Residential>Troubleshooting & Repair ServicesGFCI OutletsAFCI BreakersWhole House Surge ProtectionElectrical Safety InspectionsSmoke & CO DetectorsGenerator InstallationElectrical Panel UpgradesDedicated CircuitsIndoor LightingLandscape LightingFan InstallationPool & Hot Tub WiringEV Charger InstallationWhole House RewiringHome Theater InstallationCommercial>Troubleshooting & Repair ServicesDedicated Computer CircuitsElectrical Safety InspectionsSurge ProtectionGenerator InstallationElectrical Panel UpgradesBucket Truck ServicesEquipment HookupsIndoor & Outdoor LightingReviewsAreas We Serve>Montgomery County, PABucks County, PAChester County, PADelaware County, PABerks County, PAPhiladelphia County, PAPhotosOur TeamBlogDealsCommunity OutreachCompaniesCareersAccomplishments

Dryer Booster Fan: What Is It And How Does It Work?

We recently got a call from a customer this week who was in need of a dryer booster fan replacement. We realized we haven’t done a blog about one of these bad boys yet, so of course it was a no-brainer that we write one today! Let’s get right into what a dryer vent booster fan is, how it works, why you may need one, and who to call for installation.


What Is A Dryer Booster Fan?

A dryer vent booster fan is a fan that connects to your dryer duct to help increase airflow. The boost in airflow with a fan like this allows for the successful removal of built-up dryer lint in your ductwork, as well as efficient drying time of your clothing.


How Do Dryer Booster Fans Work?

Dryer booster fans utilize backward inclined blades to effectively pull air out of the duct while allowing for other debris like dryer lint to pass through. 


Do I Need A Dryer Vent Fan?

You may need a booster fan for your dryer if you are experiencing long drying times, if your duct run for your dryer is over 25 feet long, or if your duct run for your dryer has multiple bends. If you are noticing that you need continual duct cleanouts from dryer lint and debris, you may also benefit from a booster fan for your dryer.


Benefits of Dryer Booster Fans

Extended ventilation.Reduced drying time for your clothing.Reduced energy consumption since your dryer won’t be running as long. (50% or more!)Reduce fire hazard of lint build-up.You won’t need continuous duct cleanouts from a professional. (saves you cash!)


Who Can Install My Dryer Booster Fan?

Hire a professional who is licensed and insured to install your new dryer vent fan. The master electricians at KB Electric LLC can help install any and all types of booster fans for any ductwork. We are licensed and insured, versed in the NEC (National Electric Code), and our techs have the proper tools and equipment for safe installation. Call us today! (267)-467-3178. 

CATEGORIES

4-Prong OutletsAbout KB Electric LLCAttic FansBallast ReplacementBathroom LightingCable Outlet InstallationCarbon Monoxide DetectorsCeiling Fan InstallationChandelier InstallationChristmas Light SafetyCircuit BreakersCommercial Electrical Safety InspectionsCommercial ElectricianCommercial LightingCurrent Events with ElectricityCurrent Events: EnergyDeck LightingDeck Receptacles/OutletsDedicated CircuitsDeicing CablesDimmer SwitchesDisposing Light BulbsDoorbellsDryer Booster FansElectricity and Energy InnovationsElectric Baseboard Heater InstallationElectric Car Charging InstallationElectric Radiant Floor HeatingElectrical InformationElectrical InnovationsElectrical Panel UpgradeElectrical Remodeling ServicesElectrical Safety InspectionsElectrician vs. Electrical InspectorElectricity BillElectromagnetic FieldsEmergency DisconnectsEmergency Lighting and Exit Sign LightingEnergy Saving TipsEthernet Wall JacksEV Charging SafetyExhaust FansFestoon LightingGarage WiringGeneratorsGFCIsHigh Bay LightingHire a Licensed ElectricianHistory of Ceiling FansHistory of the Dimmer SwitchHistory of Electric CarsHome Electric Car Charging InstallationHot Tub WiringHouse RewireIn The NewsIntercom SystemsKitchen LightingKnob & Tube WiringLED Ballast BypassLED Christmas LightsLED Retrofit LightingLEDsLi-Fi TechnologyLight Color TemperatureLightingLightning FactsLow Voltage Landscape LightingMotion SensorsMoonlightingOutlet SafetyOutdoor Ceiling FansOutdoor Home Security Lighting TipsOutdoor Lamp PostsOutdoor LightingOutdoor Outlet CoversOutdoor Receptacles/OutletsOutdoor Shed WiringParking Lot LightingPendant LightingPhotocell SensorsPool WiringPower and Communication PolesProperty Management ElectricianRange HoodsRecessed LightsRecessed OutletsRenewable EnergyRomex WiringRV Home Electrical HookupSafety & PreventionShed WiringSingle Phase to Three PhaseSmall BusinessesSmart Light SwitchesSmart OutletsSmart ThermostatsSmoke DetectorsSolar Powered ElectricitySpace HeatersStorefront LightingSurge ProtectionSwimming Pool Electrical SafetySwimming Pool Area LightingSwimming Pool LightingThanksgiving FunTools of the TradeTrack Lighting InstallationTransformersTunable White LEDsTV Wall Mount InstallationTwist Lock ReceptaclesUnder Cabinet LightingUSB OutletsVideo Doorbells

The post Dryer Booster Fan: What Is It And How Does It Work? appeared first on KB Electric LLC.

post

Hardwired vs Plug-In EV Charging Installation: Which Is Better?

Residential>Troubleshooting & Repair ServicesGFCI OutletsAFCI BreakersWhole House Surge ProtectionElectrical Safety InspectionsSmoke & CO DetectorsGenerator InstallationElectrical Panel UpgradesDedicated CircuitsIndoor LightingLandscape LightingFan InstallationPool & Hot Tub WiringEV Charger InstallationWhole House RewiringHome Theater InstallationCommercial>Troubleshooting & Repair ServicesDedicated Computer CircuitsElectrical Safety InspectionsSurge ProtectionGenerator InstallationElectrical Panel UpgradesBucket Truck ServicesEquipment HookupsIndoor & Outdoor LightingReviewsAreas We Serve>Montgomery County, PABucks County, PAChester County, PADelaware County, PABerks County, PAPhiladelphia County, PAPhotosOur TeamBlogDealsCommunity OutreachCompaniesCareersAccomplishments

Hardwired vs Plug-In EV Charging Installation: Which Is Better?

If you are on the market for a new electric vehicle (EV), you’re probably doing a lot of research on the best options for charging one. KB Electric LLC has been doing EV charger installations for quite some time, and the calls keep coming in to get them done. Many EV owners purchase a level 2 charger and have one of our master electricians install it for them. There are two options when installing your level 2 EV charger: a hardwired vs plug-in EV charging installation. So, which is better? Let’s take a look at what a level 2 EV charger is, the two options for installing one, and which option KB Electric LLC recommends for installation.

Before we dabble with the details, no matter the hardwired type or plug-in, EV chargers should be installed by a professional. KB Electric LLCalways recommends that a licensed and insured electrician installs your EV home charger, especially if it is hardwired.


Hardwired EV Charging Installation – Tesla Charger


What Is a Level 2 EV Charger?

A Level 2 EV Charger utilizes a 240v outlet, also known as a NEMA 50r receptacle (when not hardwired). This outlet is the same as the one your clothing dryer uses (if you don’t have a hardwired dryer). Level 2 EV chargers can take up to 6.5 hours to fully charge the battery using a brand like the ClipperCreek LEVEL 2 HCS-40PR. For most brands of EVs, level 2 chargers are typically 3 to 5 times faster to fully charge the battery than a level 1 EV charger (utilizes a 120v outlet). 

There are so many brands of level 2 EV chargers on the market. Most of these EV chargers can be installed inside or outside of your garage. Most of the level 2 EV chargers can also be hardwired instead of plugged in using the 240v outlet. What does hardwiring your EV charger entail? Let’s go over it.


Hardwired vs Plug-In EV Charging Installation 

Hardwired

With a hardwired EV charging installation, an electrician installs a dedicated 60AMP line from your main electrical panel to the desired EV charger location. At KB Electric LLC, we install a fire-rated backboard, as well as the NEC code required sub-panel to terminate power to the unit if needed. For this installation, the EV charging unit does not utilize a 240v outlet since it is hardwired into your main panel. 


Hardwired EV Charger Installation


Plug-In

With a plug-in EV charging installation, an electrician installs a 240v outlet also known as a NEMA 50r receptacle, at the desired EV charger location to plug into. 


Plug-In EV Charger Installation
Plug-In EV Charger Installation – NEMA 50r (240v) Receptacle


Plug-In EV Charger Installation - NEMA 50r (240v) Receptacle
Plug-In EV Charger Installation – NEMA 50r (240v) Receptacle


Should I Get A Hardwired or Plug-In EV Charger Installation?

At all comes down to preference. Personally for the owner at KB Electric LLC, the hardwired option looks the cleanest. So you can say it all comes down to aesthetic appeal. Just take a look at the two pictures above in the hardwired section of this blog . The cord on the EV charger rolls up nicely, and you don’t have any wires hanging down. It also poses less of a trip hazard from the cord being left out. Either way, the hardwired or the plug-in EV charger install can be executed by the master electricians at KB Electric LLC. Call us today for your EV charging installation! (267) 467-3178

CATEGORIES

4-Prong OutletsAbout KB Electric LLCAttic FansBallast ReplacementBathroom LightingCable Outlet InstallationCarbon Monoxide DetectorsCeiling Fan InstallationChandelier InstallationChristmas Light SafetyCircuit BreakersCommercial Electrical Safety InspectionsCommercial ElectricianCommercial LightingCurrent Events with ElectricityCurrent Events: EnergyDeck LightingDeck Receptacles/OutletsDedicated CircuitsDeicing CablesDimmer SwitchesDisposing Light BulbsDoorbellsDryer Booster FansElectricity and Energy InnovationsElectric Baseboard Heater InstallationElectric Car Charging InstallationElectric Radiant Floor HeatingElectrical InformationElectrical InnovationsElectrical Panel UpgradeElectrical Remodeling ServicesElectrical Safety InspectionsElectrician vs. Electrical InspectorElectricity BillElectromagnetic FieldsEmergency DisconnectsEmergency Lighting and Exit Sign LightingEnergy Saving TipsEthernet Wall JacksEV Charging SafetyExhaust FansFestoon LightingGarage WiringGeneratorsGFCIsHigh Bay LightingHire a Licensed ElectricianHistory of Ceiling FansHistory of the Dimmer SwitchHistory of Electric CarsHome Electric Car Charging InstallationHot Tub WiringHouse RewireIn The NewsIntercom SystemsKitchen LightingKnob & Tube WiringLED Ballast BypassLED Christmas LightsLED Retrofit LightingLEDsLi-Fi TechnologyLight Color TemperatureLightingLightning FactsLow Voltage Landscape LightingMotion SensorsMoonlightingOutlet SafetyOutdoor Ceiling FansOutdoor Home Security Lighting TipsOutdoor Lamp PostsOutdoor LightingOutdoor Outlet CoversOutdoor Receptacles/OutletsOutdoor Shed WiringParking Lot LightingPendant LightingPhotocell SensorsPool WiringPower and Communication PolesProperty Management ElectricianRange HoodsRecessed LightsRecessed OutletsRenewable EnergyRomex WiringRV Home Electrical HookupSafety & PreventionShed WiringSingle Phase to Three PhaseSmall BusinessesSmart Light SwitchesSmart OutletsSmart ThermostatsSmoke DetectorsSolar Powered ElectricitySpace HeatersStorefront LightingSurge ProtectionSwimming Pool Electrical SafetySwimming Pool Area LightingSwimming Pool LightingThanksgiving FunTools of the TradeTrack Lighting InstallationTransformersTunable White LEDsTV Wall Mount InstallationTwist Lock ReceptaclesUnder Cabinet LightingUSB OutletsVideo Doorbells

The post Hardwired vs Plug-In EV Charging Installation: Which Is Better? appeared first on KB Electric LLC.

post

Bedside Bearer: First Ever Wall Mounted, Motion-Activated Night-light Cup Holder

Residential>Troubleshooting & Repair ServicesGFCI OutletsAFCI BreakersWhole House Surge ProtectionElectrical Safety InspectionsSmoke & CO DetectorsGenerator InstallationElectrical Panel UpgradesDedicated CircuitsIndoor LightingLandscape LightingFan InstallationPool & Hot Tub WiringEV Charger InstallationWhole House RewiringHome Theater InstallationCommercial>Troubleshooting & Repair ServicesDedicated Computer CircuitsElectrical Safety InspectionsSurge ProtectionGenerator InstallationElectrical Panel UpgradesBucket Truck ServicesEquipment HookupsIndoor & Outdoor LightingReviewsAreas We Serve>Montgomery County, PABucks County, PAChester County, PADelaware County, PABerks County, PAPhiladelphia County, PAPhotosOur TeamBlogDealsCommunity OutreachCompaniesCareersAccomplishments

Bedside Bearer: First Ever Wall Mounted, Motion-Activated Night-light Cup Holder

Meet the Bedside Bearer: the first ever wall mounted, motion-activated night-light cup holder equipped with a fiber optic LED light. This LED light wraps around the ring of the cup holder and is gentle on the eyes so as to not disturb your circadian rhythm. Fitting all types of drinkware, the Bedside Bearer is patent-pending, made in America, and installs to virtually all types of wall surfaces. 

But why a wall mounted cup holder you may ask? Isn’t that what my nightstand is for? Let’s give you a little background of how the Bedside Bearer came to fruition, describe how it works, the goal of the product, and the vision of the company behind this patent-pending invention.


How The Bedside Bearer All Began

First of all, let’s explain why KB Electric LLC is blogging about the Bedside Bearer to begin with. Not only is it an electrical innovation that deals with LED fiber optics and is a first of its kind, but the owner of KB Electric LLC created it. That’s right! Owner and operator, Keith Busby of KB Electric LLC came up with this invention while laying in bed one night. If you know Keith like I do (because I’m his wife), you know that he constantly spills his glass of water onto his nightstand and floor in the middle of the night. He can’t see in the pitch black of the night, and constantly fumbles around looking for his cup of water to quench his dry mouth. 

The dropped glasses of water was so bad that while moving our old furniture into our new home, Keith noticed mold on the back of his nightstand. This is no joke.

So, we laid there and after the thousandth time of spilling his water onto the floor, the lightbulb clicked on. “I need a cup holder with a light on it!” 

After the idea came to him, Keith called up his buddy, Kevin and they decided to create the one-of-a-kind invention. After three years of development and research and three prototypes later, the Bedside Bearer is patent-pending and almost ready for production.


Why The Bedside Bearer?

Made in America!Declutters your nightstand, giving you more space for books, reading glasses, tissues, iPad, mouth guard, smart phone, alarm clock, etc. (LESS CHANCE FOR SPILLS!)Perfect for quenching the thirst in the morning and in the middle of the night.Your drink can hang on your wall in smaller spaces without a nightstand.The illumination from the Bedside Bearer won’t wake your spouse, and you won’t need to turn on any bedroom lights.Gentle LED fiber optic light won’t disrupt circadian rhythm. Versatile: The Bedside Bearer isn’t justfor bedrooms. It can accommodate any space with minimal furniture like your garage/shed, RV camper, small living room, etc.Perfect gift ideas for anyone!Fits a wide variety of drinkware.Sleek design complements any home decor. 

How Does The Bedside Bearer Work?

Once you attach your Bedside Bearer to any flat wall surface, you are all set for the Bedside Bearer to hold any type of drinkware. This motion-activated LED fiber optic cup holder operates with 2 AAA batteries. Just wave your hand in the vicinity of the cup holder, and the gentle LED light turns on via a motion sensor. The LED fiber optic light featured on the ring has a soft glow and is gentle on the eyes. It will give enough light to see your cup without disturbing or waking up your partner.


Giving Back

The Bedside Bearer simplifies needing a drink at night, but there are many around the world who do not have access to any water at all, day or night. That is why 5% of the profits will go towards World Vision. This non-profit creates wells for people who need clean drinking water.


Where Can I Buy a Bedside Bearer?

The kickstarter page to help with funding for the production of the Bedside Bearer is coming soon! Check out the website for more info: bedsidebearer.com

Please send the company an email if you are interested in buying a Bedside Bearer and for up-to-date information about the process of its development. Email: [email protected]

We will update this section of the blog with the Bedside Beater kickstarter page when it goes live!

CATEGORIES

4-Prong OutletsAbout KB Electric LLCAttic FansBallast ReplacementBathroom LightingCable Outlet InstallationCarbon Monoxide DetectorsCeiling Fan InstallationChandelier InstallationChristmas Light SafetyCircuit BreakersCommercial Electrical Safety InspectionsCommercial ElectricianCommercial LightingCurrent Events with ElectricityCurrent Events: EnergyDeck LightingDeck Receptacles/OutletsDedicated CircuitsDeicing CablesDimmer SwitchesDisposing Light BulbsDoorbellsDryer Booster FansElectricity and Energy InnovationsElectric Baseboard Heater InstallationElectric Car Charging InstallationElectric Radiant Floor HeatingElectrical InformationElectrical InnovationsElectrical Panel UpgradeElectrical Remodeling ServicesElectrical Safety InspectionsElectrician vs. Electrical InspectorElectricity BillElectromagnetic FieldsEmergency DisconnectsEmergency Lighting and Exit Sign LightingEnergy Saving TipsEthernet Wall JacksEV Charging SafetyExhaust FansFestoon LightingGarage WiringGeneratorsGFCIsHigh Bay LightingHire a Licensed ElectricianHistory of Ceiling FansHistory of the Dimmer SwitchHistory of Electric CarsHome Electric Car Charging InstallationHot Tub WiringHouse RewireIn The NewsIntercom SystemsKitchen LightingKnob & Tube WiringLED Ballast BypassLED Christmas LightsLED Retrofit LightingLEDsLi-Fi TechnologyLight Color TemperatureLightingLightning FactsLow Voltage Landscape LightingMotion SensorsMoonlightingOutlet SafetyOutdoor Ceiling FansOutdoor Home Security Lighting TipsOutdoor Lamp PostsOutdoor LightingOutdoor Outlet CoversOutdoor Receptacles/OutletsOutdoor Shed WiringParking Lot LightingPendant LightingPhotocell SensorsPool WiringPower and Communication PolesProperty Management ElectricianRange HoodsRecessed LightsRecessed OutletsRenewable EnergyRomex WiringRV Home Electrical HookupSafety & PreventionShed WiringSingle Phase to Three PhaseSmall BusinessesSmart Light SwitchesSmart OutletsSmart ThermostatsSmoke DetectorsSolar Powered ElectricitySpace HeatersStorefront LightingSurge ProtectionSwimming Pool Electrical SafetySwimming Pool Area LightingSwimming Pool LightingThanksgiving FunTools of the TradeTrack Lighting InstallationTransformersTunable White LEDsTV Wall Mount InstallationTwist Lock ReceptaclesUnder Cabinet LightingUSB OutletsVideo Doorbells

The post Bedside Bearer: First Ever Wall Mounted, Motion-Activated Night-light Cup Holder appeared first on KB Electric LLC.